Latest update: 7/10/2015 (40+ updates since Jan 2010)
Anyone Can Learn the Correct Swing Technique
Everyone has heard this one:
That kid has a natural swing. You can't teach that.
The "natural swing" is just perfect technique. So, of course it can be taught.
Hitting Myths
Mike Epstein says "Hitters are born with the natural swing; coaches take it away"
What most coaches are teaching and what the great hitters have actually been doing for over 100 years is something completely different.
When you watch a hitter take a swing, everything is moving so fast that you don't know exactly the mechanics of what's
going on, but you may intuitively know a good swing when you see it.
When a pitcher lets go of a ball at their head, the ball usually comes in at a 10 degree downward angle. The best way to hit this ball is to use a 10 degree uppercut swing path with the bat.
Most MLB hitters use an uppercut swing path. (just as Ted Williams described in his book in 1971)
Most coaches and instructors give cues that promote a downward bat path.
Hitting myths are created and promoted everywhere you look.
Everyone hears this craziness from MLB announcers:
He got good extension on that one.
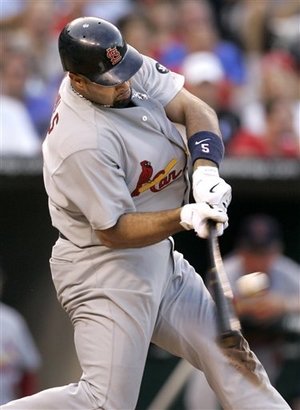
Posters promote myths
Everyone has seen player posters showing arms extended long after the ball has been struck.
(see this popular poster of Pujols at left).
These posters lead most people to mistakenly think your arms should be extended in order to hit a baseball.
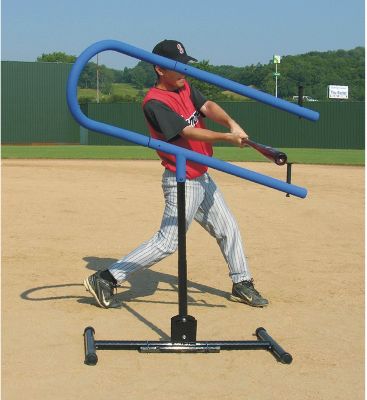
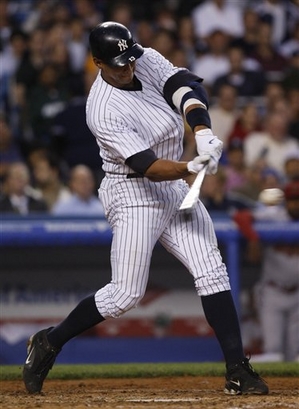
Even Louisville Slugger promotes myths
What about pictures of players using hitting aids, ex. the picture of hitting "aid" at left?
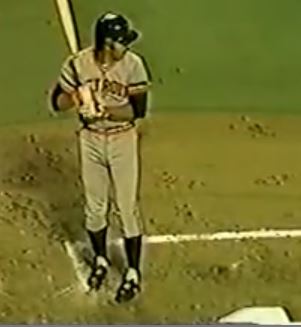
No MLB player uses this swing path, or hits the top of the ball, and most don't extend their arms like this at contact.
Hanson Principle
To combat hitting (and pitching) myths, I follow what's called the Hanson Principle (named after Mark Hanson) - look at what players do on video, not what they say they do.
Baseball fever post
Always compare anything anyone tells you to slow motion video of the best in the world. Let that be your truth detector.
Further, I look at what most MLB players actually do in a game. Not in practice. Not during warmups. Not what they say or think they do in interviews and articles. Don't base your hitting approach on one or 2 exceptions. I haven't based my approach on non-MLB players, because unless they were injured there was a reason they didn't make it to the Show.
Rotational Hitting Techniques
The major league swing is generally referred to as "rotational" hitting.
We will be focusing on the common elements of how most major leaguers actually swing.
Some instructors may say this is using a "cookie cutter" approach to hitting. We are only discussing common elements easily spotted in MLB player's swings - and leave stance choice, stride choice, after-contact moves, etc. up to each individual player.
Of course, we are not saying you will become a MLB hitter when you use these techniques.
We will explain the basic techniques and help you to avoid non-productive techniques.
We will try our best to not use any technical jargon, baseball buzzwords, or obscure medical references (I am no doctor and I do not play one on the Internet).
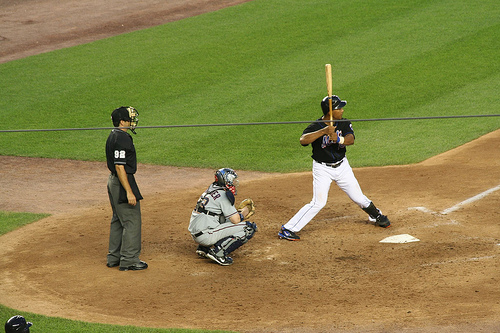
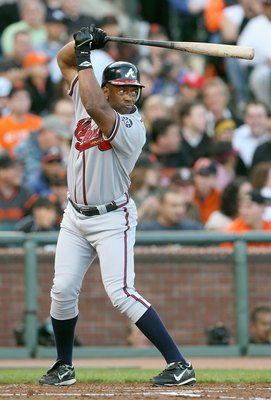
Toe Touch Through Ball Contact
Major League hitters have a unique stance, but most have roughly the same swing from toe touch to ball contact. So, let's explore the common elements of the swing.
Here is Chipper Jones at toe touch and at ball contact. Chipper is using basically the same swing (from toe touch to contact) as most major leaguers.
Chipper at Toe TouchChipper at Ball Contact
The Swing in Three Stages
We will explore the 3 phases of a swing:
the Stance
the Coil (aka weight shift and/or stride)
the Swing Forward
These phases are easy to review and to practice as separate units.
1. Stance ('mostly' personal style)
You can use your unique flair here, but generally you must follow these basic rules:
Stand flat-footed on your back foot, knees bent (standing on the balls of your feet is a myth)
Back straight but bent at the hip
Hands can be almost anywhere (yes, it's true)
Use box grip knuckles to hold the bat (door-knocking knuckles is a myth)
Most hitters start with 'even' hips during the stance, but's not required.
However, most hitters are successful that way.
Many non-MLB hitters try unsuccessfully to use open hips in their stance, and never get them back to even.
If you start open, and you can successfully close them as you coil/stride,
then the open stance is good for you.
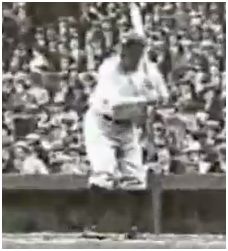
If you start closed like Babe Ruth or John Wockenfuss,
and you use that to drive your rear hip forward as part of your coil/stride then the closed stance will work for you.
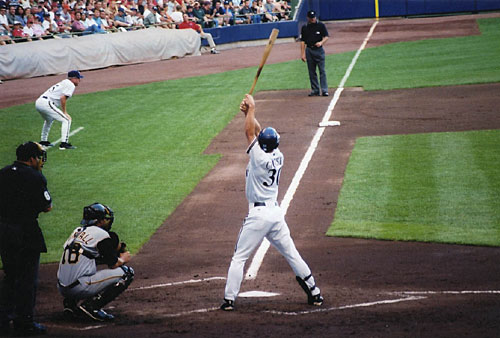
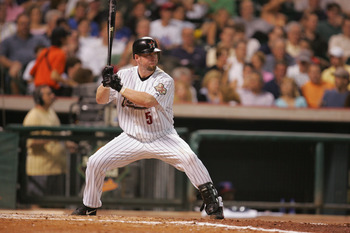
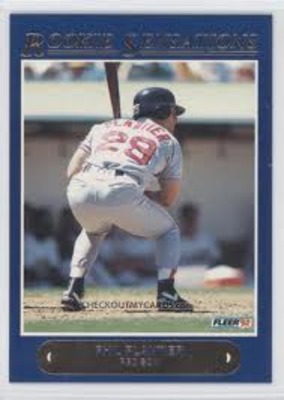
Here are a few examples of unique styles or stances:
Craig Counsel Arms reaching for the skyMoises Alou Knee knockerJulio Franco 82-07 Bat over his headJeff Bagwell Astros 1991-2005Kevin YoukilisPhil Plantier Crouching 1990-1997John Wockenfuss 1982 Closed Stance h/t BBSG
Here are some "musts" during the stance:
Upside down
Shoulders - your shoulders should not be "upside down" where the back shoulder is down and the front shoulder is up
One hand must have a loose grip on the bat (usually the top hand is loose)
Here are some cues that are not always 'musts'.
Even though most DVDs and YouTubes suggest otherwise,
these are not required. In other words, if your kid/hitter doesn't do these,
you don't necessarily have to change them in order to have a good swing.
Babe Ruth's stance
Weight 60% on the back foot, weight on the inside of the feet, Spread your feet out so that they are roughly XX to XX inches wider than your shoulders
Slight bend in both knees (the front knee is optional)
Hands as close to the hitting position as possible
2. Coil (aka Stride, Load, Weight Shift) to Toe Touch
Shift Your Weight from Back to Front
Babe Ruth gave the same advice back in the 1920s. So, this is nothing new.
Hitters accomplish this weight shift via one of 2 methods:
Stride via back leg drive (preferred) then push/fall forward. Front leg underbody and rear leg behind you. Pick up your front leg and drive/fall forward.
No stride with a leg kick (fall forward) (see Note 1 below). Pick up your front knee and fall down.
Chipper Jones Coil Move
Pick one of the two stride methods, then do the following as you shift your weight forward:
Coil in - take a strong inward turn as you move forward.
Shoulders and hips should rotate around the spine (do not take a slower 'gate swing' around the back hip)
MLB hitters turn their shoulder inward from 10-40 degrees - typically around 30 degrees.
The front hip/shoulder move in unison.
The rear shoulder should not rotate beyond (behind) the rear hip.
It's OK for the rear hip to rotate beyond the rear shoulder slightly during the stride.
Coil out Just before the front foot touches, you must begin to uncoil, or coil out.
The rear hip/shoulder now move in unison.
The front hip may begin to lead the front shoulder before toe touch, but it will definitely lead after toe touch.
During the stride or weight shift
Hands go back (see Note 2 below) to a spot 'near' the shoulder
- don't take the hands too far in front of (optional), or behind (requirement), the shoulder
- should be able to touch your shoulder with your extended top thumb (this is not a requirement, but it's simpler to learn)
Back elbow goes "up" and back.
- "Up" means even with the shoulder or slightly lower (see picture of Chipper below)
- Why up?
Back forearm must be near horizontal at toe touch
Front armpit and upper bicep is somewhat tight against the body
- should be able to fit a fist between your front elbow and your body (not too far away)
The front arm is generally stretched back (it may appear to 'arm bar'), although it may have some bend to it.
Balance Your hips must be between your feet. Not too far forward (called lunging) and not on your back foot
- at toe touch your head should be roughly centered between your feet
Lunging "Its not enough just to stride.
You have to catch your weight on the stride foot [think torso] ... drifting suggests you are [just] putting your stride foot out but with your weight on the back foot.
Some say weight goes back then to middle. If you are finding the middle as you come forward and your swing starts,
your hips drift (per MajorDan SetPro.com in 2002).
'Secret' stride drill Use ordinary bathroom scales to learn how to stride your weight.
Stride Your Weight
Note 1 - warning to hitters about the 'no stride' approach.
Some MLB hitters are successful using the 'no stride' method. They are able to successfully coil as described above.
Many instructors will eliminate the stride in a kid's natural swing in an effort to fix some other problem.
Generally, this leads to compounding the original problem by eliminating their natural coil/load,
and their timing mechanism.
This new swing may placate the coach since the hitter may have more contact for the remainder of the season,
but the hitter will generally have a weaker, mediocre swing for life.
So, the coil/load is the most important element. Make sure you don't eliminate it or reduce it's effectiveness.
Note 2 - 'hands go back'
The hands of MLB hitters usually go 'back' (toward the catcher). But some of them may go up, or down, or forward. So, it's not necessary to go back, per se.
The constant is that the hands are in a place near the shoulder at toe touch. So, be careful before changing a swing simply because the hands go to the shoulder from above, or below, or behind the shoulder.
When to begin the stride?
Begin your stride on every pitch, not just strikes.
Your front foot must be down roughly halfway before the ball reaches the plate, so you have time to complete the swing forward phase.
Toe Touch (aka Launch Position)
Chipper Jones at Toe Touch
After you shift your weight forward, you should land on your toe.
Touch the toe or inside ball of foot, not the heel. Why? Your hips tend to open up prematurely if you use your heel.
Back elbow is up. Why up? (Note that you don't begin your stance with it up, rather,
you typically move it back (see Note 2 above) toward the catcher as you stride forward)
Back forearm must be roughly horizontal (not vertical)
Hips are even, not open
The rear shoulder is generally even with the rear hip from this point forward.
The rear shoulder should not be significantly behind the rear hip (I see this in many tee swings).
Front shoulder MUST be lower than the back shoulder
Cues to use: Push your torso forward, stride for every pitch, stride when the pitcher releases the ball, easy stride, coil back as you go forward, elbow up at touch, hips even
Hitting faults: Rear forearm is vertical
This is the primary cause of bat drag
When the ball is halfway (30 feet, or 2/10 of a second) and you determine the ball is going to end up in the strike zone,
start driving your back shoulder and back elbow down toward your hip. Your hands stay near your shoulder at this stage.
This drive/rotation should normally begin at the moment of toe touch, however,
you can wait briefly if you were fooled by an offspeed pitch.
Note that I have segregated the Swing Forward Phase into the swing to hip and hip to contact phases.
This is purely for discussion purposes, and does not mean to imply that there is any halt, slowing, or pause to the swing during the entire swing forward phase.
Swing to Hip Phase (the secret to hitting)
Mike Trout Swing to Hip
The drive to the hip is one of the most important and least understood phases of the swing.
Initiate the swing by simultaneously:
Driving your back shoulder and back elbow down as a unit as you rotate/tilt
Move the bat head backwards towards the catcher, not solely with your hands, but by using the more powerful leverage of your back elbow/forearm and the shoulder drive.
Then:
The downward drive of the back shoulder, and the rotation caused by your front knee opening just before toe touch,
will open your front hip just ahead of your front shoulder (your front hip must 'clear'
- or get on the back side of your axis
- otherwise you have a slower 'gate' swing)
The front hip will initially advance ahead of the front shoulder during this phase, then return to even near contact.
Your back hip, however, stays even with your back shoulder during this phase (this is not a typo - the torso twists to make this happen)
Your hips rotate around your torso/spine (not around either leg, which again would be a 'gate' swing)
Don't move your hands away from your shoulder (they should not go back, and should not move faster than the shoulder,
or push away from the shoulder - yet)
Keep your back knee straight ahead as long as possible -
don't let it roll over until just before the back elbow 'slots' (see Trout).
This will result in your back heel staying down (longer) during the first half of the Swing to Hip Phase (see Trout)
Important tip: High level hitters move their hands below their front elbow.
They do not move their front elbow above their hands.
Cues to use: drive down, clear your (front) hip, tilt, hands back, back heel down, knees forward
Destructive cues: hands to the ball, don't drop your shoulder, squish the bug or roll your back knee early, swing down on the ball
Hitting faults: Hands to the ball/ swing down on the ball
The most common problems in this phase,
destructive cues like "hands to the ball", "swing down on the ball",
and a basic misunderstanding of the MLB swing,
cause the swing path to angle down instead of angle up at contact.
Bat Drag
A very common problem is commonly called 'bat drag'.
It's easily seen in video/pictures when the back elbow gets ahead of the hands during this 'Swing to Hip' phase.
This is primarily caused by a near vertical forearm at toe touch,
but can sometimes be caused by the hands moving back towards the catcher during this phase.
During this phase, the hands should be staying in unison with the shoulder (which is rotating and moving forward),
and the hands should not usually be behind the back elbow.
Chicken Wing FaultChicken winging
Another common problem in this phase is what I call "chicken winging",
where you drop your back elbow without also driving your back shoulder down,
and more importantly, without also moving the bat head back toward the catcher.
Secret Drills:
You don't need any DVDs, or instructors, or paid lessons.
Just practice this Swing to Hip Phase in the mirror. This should be the first thing you learn in T-Ball.
Hip to Contact Phase - Rotate/ Pendulum
Chipper Jones Hip to Contact
As your back elbow reaches the level of your rear hip:
Keep your back elbow rotating with/near your rear hip, as you extend your forearm
Only then do you begin to throw your hands forward away from your shoulder
Pull back on the knob with your front or lead hand to allow the bat head to swing in front of your hands to contact
During this phase, the bat head should angle down, then level off around the center of your body, then begin an upward arc toward the ball in the same plane as the pitched ball.
If you use the proper uppercut swing path and hit the ball "square", you should return it to the height of the pitcher's hand at ball release.
Hitting faults: Shoulders stop rotating
The shoulders must not pause or stop during this phase.
Front bicep/elbow pushes away from the body
The front bicep/shoulder should remain at the same distance from the torso during this phase.
If the front arm 'disconnects' like this, you will lose the power from your body and have an 'armsy' swing.
See the Babe Ruth Towel drill page to help correct.
At Ball Contact
Chipper Jones at Contact
Your hips should be facing the pitcher
Your back elbow should be 'slotted' - or roughly L-shaped and somewhat close to your body
The bat head must be just in front of, or at least even with, your hands - preferably near the ball of your front foot (or the back of your front foot for low and outside pitches)
Notice, your shoulders should not be even - they are (gasp!) "dipped" - the back shoulder is now down
Your back hand should be palm up and the wrists are not rolled over
Your back foot should be on the toe, not on the ball of the foot (called "bug squishing")
After Ball Contact
Who cares?
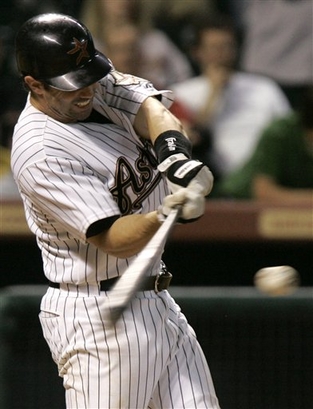
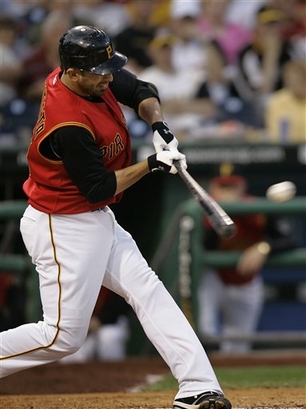
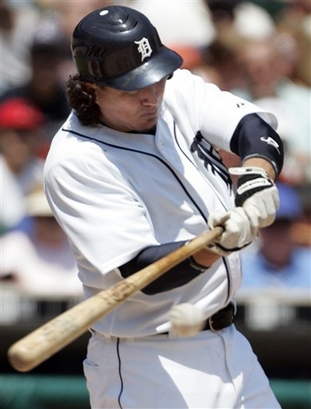
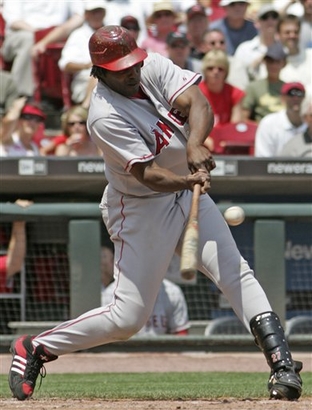
Major League Hitters at Ball Contact
Notice the following at impact with ball:
Back elbow is at the hip and bent (arms are not "extended")
Back shoulder has dropped significantly (they are not "level")
Weight has shifted to front leg (not lunging though - the head is even with the back knee)
Wrists are not rolled over
They are not swinging "down" on the ball to get the ball to go up.
The head of the bat is going up when it hits the ball.
Extend your arms to contact (unless you fooled by an offspeed pitch)
Hands to the ball, use your hands, knob to the ball
Don't drop your shoulder
Roll your wrists, line up your door knocking knuckles
Squish the bug
Hit the top of the ball to get it to go up (who came up with this one?)
Should I Teach Rotational Hitting to Kids?
Some youth coaches say you can't teach rotational hitting to kids, because they aren't strong enough,
or they aren't coordinated enough, or the techniques are too advanced, etc.
You will notice that I didn't mention power, or strength, or coordination, during any of the steps of a rotational swing.
Rotational hitting is simply a series of techniques. These techniques produce the fastest bat speed possible using the available power and strength of the player regardless of age.
The techniques I have outlined are very simple and are not too difficult for anyone to grasp. The tilt action may be the most difficult technique for a kid, but the benefits are enormous.
You may want to use the "cues to use" above as a way to simplify the swing. Of course, you may phase in the steps over time.
Updates
We are obsessed with foolproofing and testing everything on this page. And yes, we make mistakes and fess up to them here.
7/10/2015 Coil to Toe Touch Phase - stride section - provided more detail to the 'coil in' and 'coil out' process.
3/29/2015 Swing to Hip Phase - bat drag section - replaced "caused by the back elbow coming down too early" with
"primarily caused by a near vertical forearm at toe touch"
3/29/2015 Toe Touch - added hitting faults section and item "rear forearm is vertical"
3/29/2015 Stance - clarified 'open' and 'even' hips comments
3/29/2015 Hip to Contact Phase - clarified "As your elbow hits your hip" and "Keep your back elbow at your hip"
to "As your back elbow reaches the level of your rear hip" and "Keep your back elbow rotating with/near your rear hip"
3/29/2015
Coil/stride phase - added bullet point "The rear shoulder is generally even with the rear hip from this point forward.
The rear shoulder should not be significantly behind the rear hip (I see this in many tee swings)."
3/29/2015
Swing to Hip Phase - added bullet point "the front hip will initially advance ahead of the front shoulder during this phase, then return to even near contact."
3/29/2015
Coil/stride phase - added bullet point "the rear shoulder should not rotate beyond (behind) the rear hip.
It's OK for the rear hip to rotate beyond the rear shoulder slightly during the stride."
10/16/2014 Swing to Hip Phase - added tip 'High level hitters move their hands below their front elbow.'
5/28/2014 Swing to Hip Phase - clarified that the initial front hip rotation is aided by the opening of the front knee
5/28/2014 Coil/stride Phase - added Note 2 clarifying that the hands can go back, or up, or down, or forward,
and clarified that the back forearm must be near horizontal at toe touch.
4/22/2014 Swing to Hip Phase - major change - added tip to keep back heel down and keep back knee from rolling over too soon.
3/6/2014 Stance - clarified that even hips are not required
2/19/2014 Swing to Hip Phase - reworded everything about hips and shoulders for clarity. It was unnecessarily confusing.
Made it clear that the hands are not primary in turning the bat head.
2/18/2014 Coil/Stride Phase - added Warning to hitters about the 'no stride' approach
2/7/2014 Coil/Stride Phase - clarified 'Hands go back to a spot 'near' the shoulder' into optional and required components.
2/7/2014 Coil/Stride Phase - clarified 'Front hip and shoulder should turn in slightly',
to read 'Shoulders and hips should rotate around the spine.'
2/5/2014 Toe Touch position - clarified back elbow position, added 'Back forearm must be roughly horizontal (not vertical)',
and clarified 'Front shoulder MUST be down, back shoulder up',
to read 'Front shoulder MUST be lower than the back shoulder'.
2/5/2014 Swing to Hip Phase - clarified 'Don't move your hands away from your shoulder (they should not go back,
and should not move toward the ball',
to read 'Don't move your hands away from your shoulder (they should not go back,
and should not move faster than the shoulder, or push away from the shoulder'
1/18/2014 Swing to Hip - added 'Bat Drag' section to Hitting Faults
1/18/2014 Hip to Contact Phase - added Hitting Faults section (shoulder pause and front arm disconnect)
1/5/2014 Stance - added 'not musts' section
11/27/2013 Stance - added images of Bagwell, Youkilis, and Plantier
10/29/2013 Swing forward/contact - clarified back elbow slotted position
9/19/2013 Swing forward - clarified the back shoulder/elbow drive
9/9/2013 Stride/coil - major change - changed the 'preferred method' to rear leg drive, and deleted 3rd option of torso drive (from 2011-2013 I believed that torso/gravity was the main force)
9/9/2013 Stride/coil - clarifications to various coil moves and positions, revised 'hips are closed' to more accurate 'hips are even' at toe touch
9/9/2013 Swing to Hip - added specific line about moving the bat head backwards
9/9/2013 Stance - Revised hand position from 'Hands near your shoulder or ear' to 'Hands can be almost anywhere', added box grip line
9/9/2013 Hanson Principle - added this section (corrected 11/18/2013)
7/28/2013 Swing to Hip - Added comments on the 'chicken wing fault'
2/26/2013 Stride/coil - major change - Removed references to 'arm bar' as a bad thing
11/30/2012 Stance - major change - added warning about 'stand on balls of feet' myth (will put together separate myth page on this later)
9/12/2011 Swing to Hip - clarify simultaneous events in 'Swing to Hip' phase
6/30/2011 Stride/coil - added 'secret' stride drill in the 'Weight Shift' phase
4/20/2011 Swing to Hip - added front hip rotation - myth exposed in 'Swing to Hip' phase
2/15/2011 Stride/coil - added a 2002 SetPro lunging tip in the 'Weight Shift' phase
2/9/11 Stride/coil - added stride timing points in the 'Weight Shift' phase
2/1/11 Swing phase - separated swing forward phase into 'Swing to Hip' and 'Hip to Contact'
1/25/11 All - added 'destructive cues'
3/9/10 added Youth section, "cues to use", and various caveats